To remedy this I hopped online recently and purchased a 50 meter roll of knitted elastic from a seller on Ebay. With postage it came to about $20. The only problem is, it isn't the best elastic and it isn't non-roll. This doesn't mean we can't use it though, it just means we need to slightly adjust our methods of constructing garments to accomodate it.
Here's a short demo of a super quick pair of shorts made with the Make It Perfect Little Explorer pattern, which I might add, is a very handy basic short pattern to have lying around.

To begin this super quick project you should gather up your supplies:
- traced pattern
- fabric
- massive roll of 20mm knitted elastic

Step 1:
Get your front and back short pieces and overlap them along the side by 1cm (which is the seam allowance for this pattern) and cut two pieces.

Step 2:
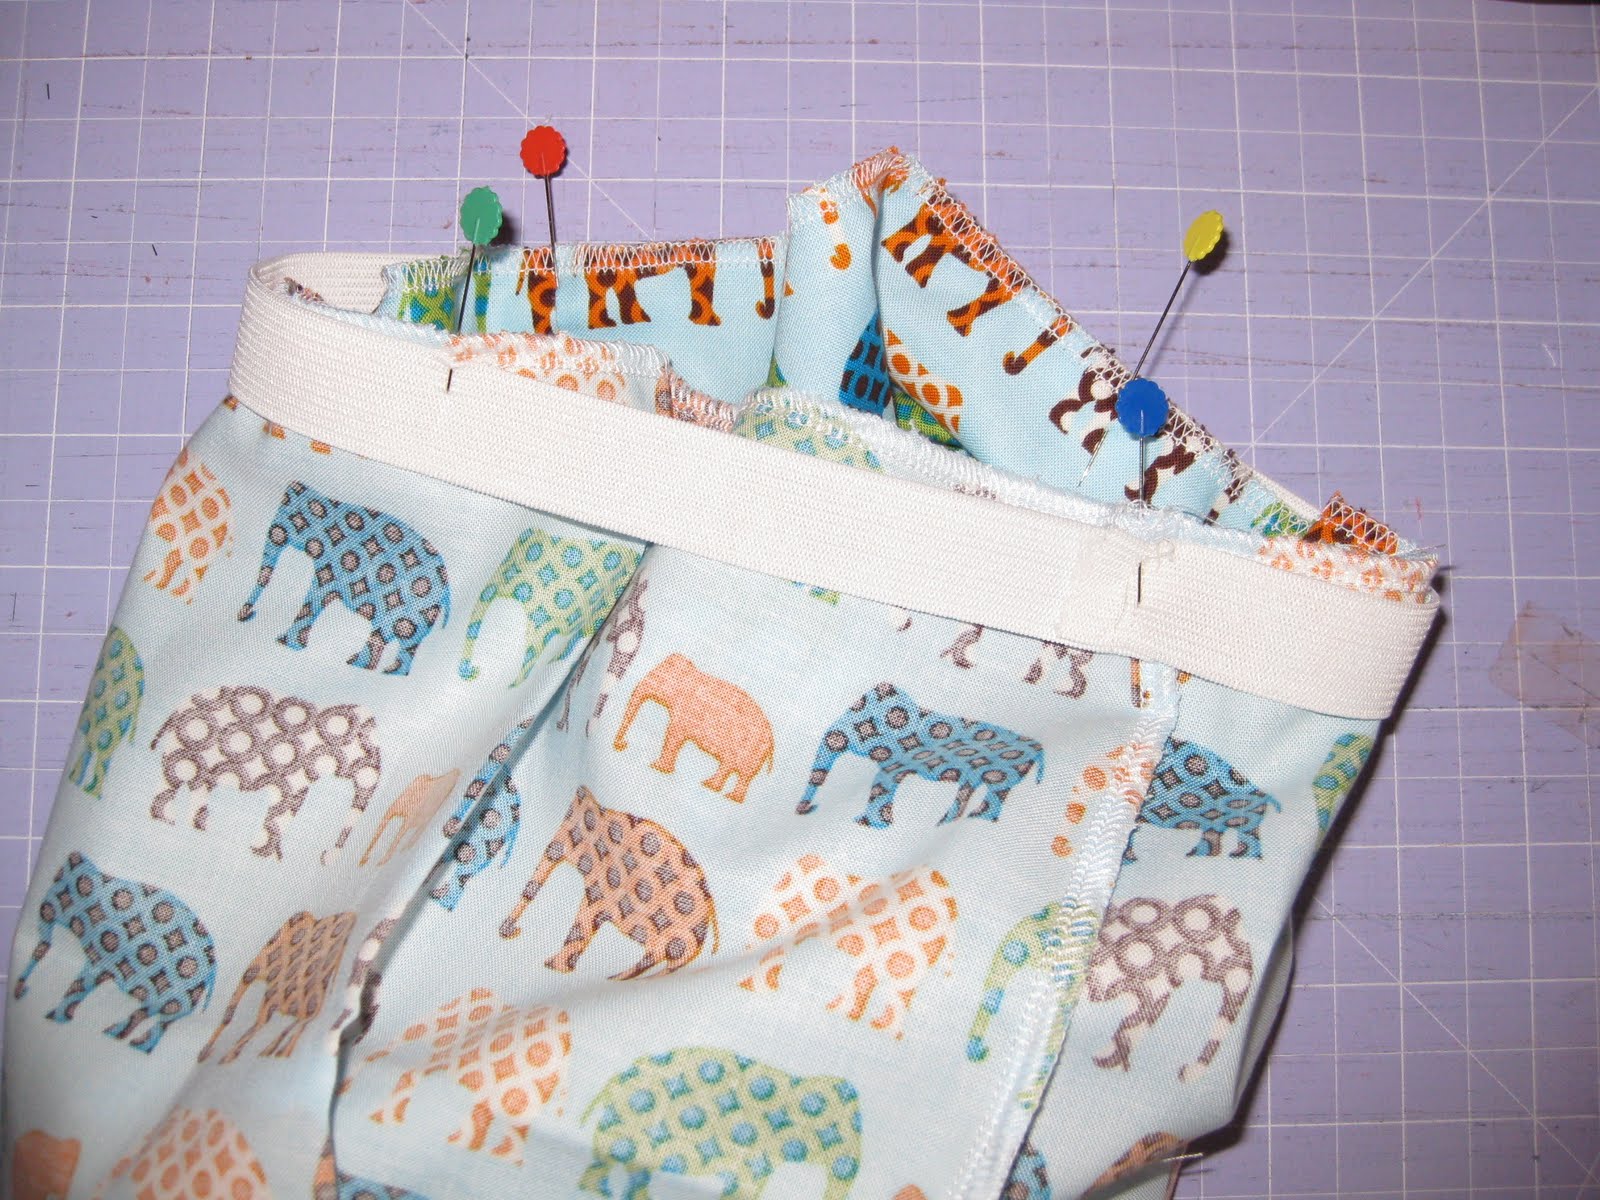
Serge the inside legs together (front and back), then slip one short side inside the other, right sides facing, and serge along inside seam, joining the two sides of the shorts in the middle. Serge around the top of the shorts while you are there too. Your shorts should look a little like this - you may or may not have a massive roll of elastic on top though...

Step 3:
Sew your elastic band into a loop, overlapping by 1 cm. Then using pins, mark the elastic into 4 equal points. This is done by folding the elastic in half, then in half again. These points are then pinned to the 4 'sides' of the inside of the shorts - meaning the two middle seams and the two outer edges.

Step 4:
Sew the elastic on to the shorts with a wide zig zag stitch, stretching the elastic as you sew.

Roll your waistband over and stitch it down with a straight stitch, again pulling the elastic taught as you sew. It's a good time now to add a small ribbon, label or other marker to the back of the shorts so that your little one puts them on the right way!

Iron small rolled hems to the bottom of the shorts and sew in place.


Hopefully you'll also have some simple summer shorts for your little one to wear on hot, hot summer days.
I'm feeling like there may be a few of these tutorials this week, so please come back!
Really cool. Quick suggestion, if the elastic is feared to be inferior, you could have left a gap, made the shorts, threaded the elastic in & when it dies, replace. Just an option. Don't toss them in the dryer, that is an elastic killer. Love your work, love Posie
ReplyDeleteThanks for the tutorial, I will try this with elastic next time.
ReplyDeleteJacqueline
Cool shorts and great tutroial. 15 minutes is pretty impressive too!
ReplyDeleteThose shorts look awesome. Must give them a whirl for my little guys.
ReplyDelete